Handmade Stamps
- Posted on
- By Kathrin
- Posted in Craft technique
- 0
Hier geht's zum ARTIKEL AUF DEUTSCH
Handmade stamps for beginners
You can easily make beautiful and very personal stamps yourself! You can decorate DIY cards, stationery, envelopes and homemade wrapping paper with your own stamps. Children can also join in (see below).
Here you will find instructions with tips for making your own stamps. At the bottom I have some inspiration for you. Enjoy making your own!
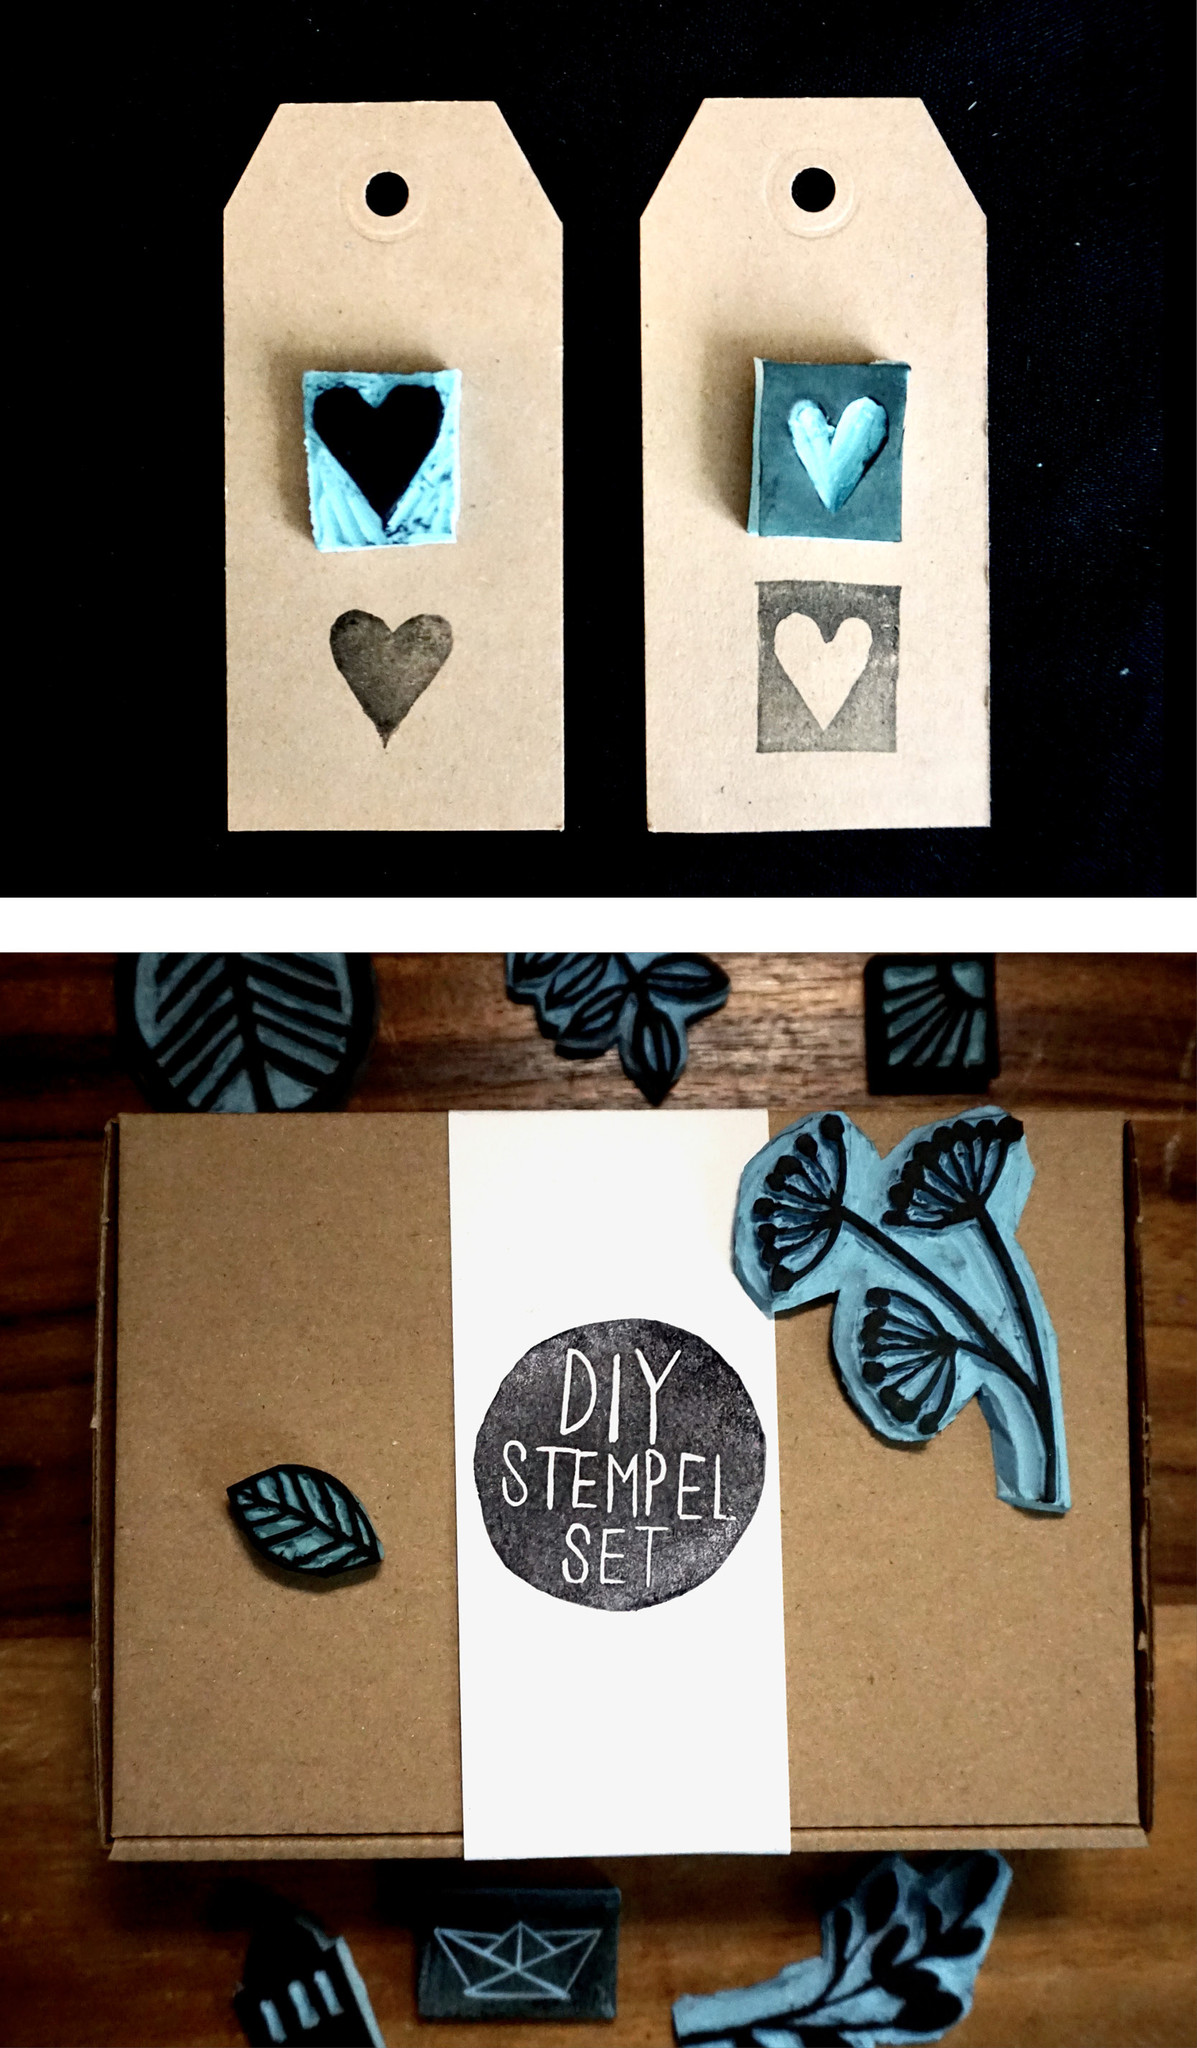
Click here for the DIY stamp set. Everything you need for carving stamps is in there!
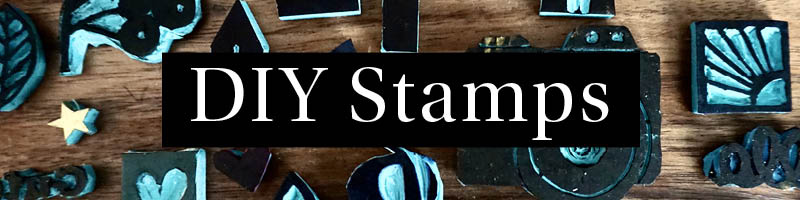
You need
Stamping mat
carving tool
Ink pad
Paper or cards as desired
helpful, but not absolutely necessary: scissors, pencil, toothbrush, scalpel, cutting mat
Tip
You can also use linocut knives for carving. Maybe you still have a set somewhere at home?
DIY Set
I have put together everything you need for stamp carving in the DIY stamp set.
Instructions
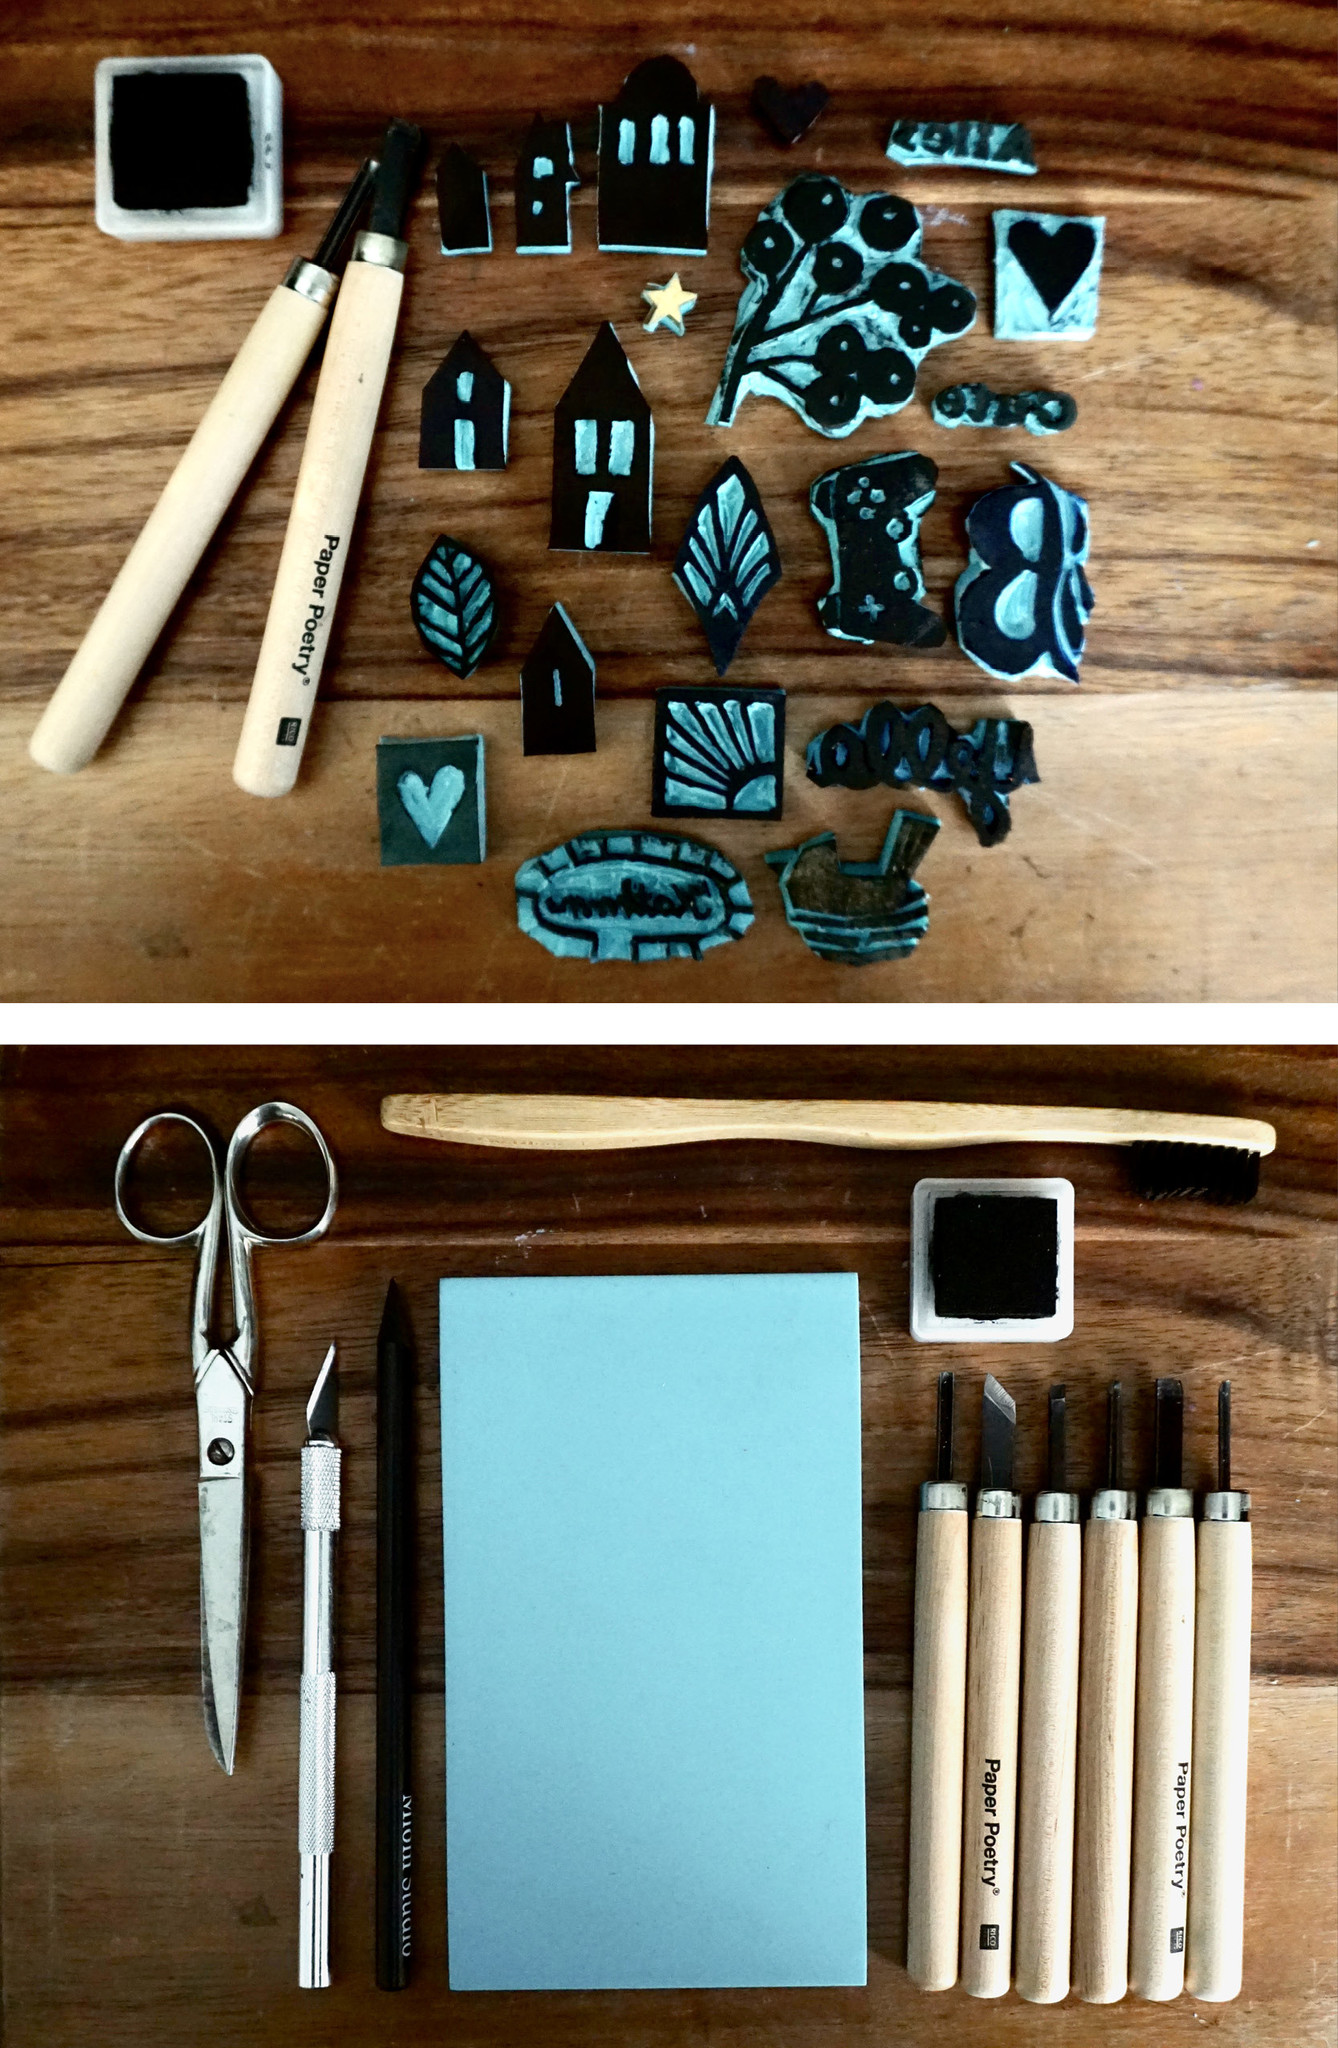
1. Your Motif
Choose a motif. You can simply start carving or you can first draw your desired motif on the stamp mat with a pencil. Think about exactly where you want to cut something out (see “Positive/negative” below). Also keep in mind that your motif will later be printed mirror-inverted.
Transfering a printed motif to a stamp mat
To transfer a printed motif to the stamp mat, trace the print with a soft pencil. Then place the painted print upside down (i.e. with the printed side down) on your stamp mat. Now rub the paper. You can do this with your fingers, an eraser, or the wooden handle of a carving knife. This is how the pencil drawing is transferred to the stamp mat. If you like, you can now trace the lines again on the stamp mat.
Since this process involves mirroring twice, you print out your motif as the stamp impression should later look.
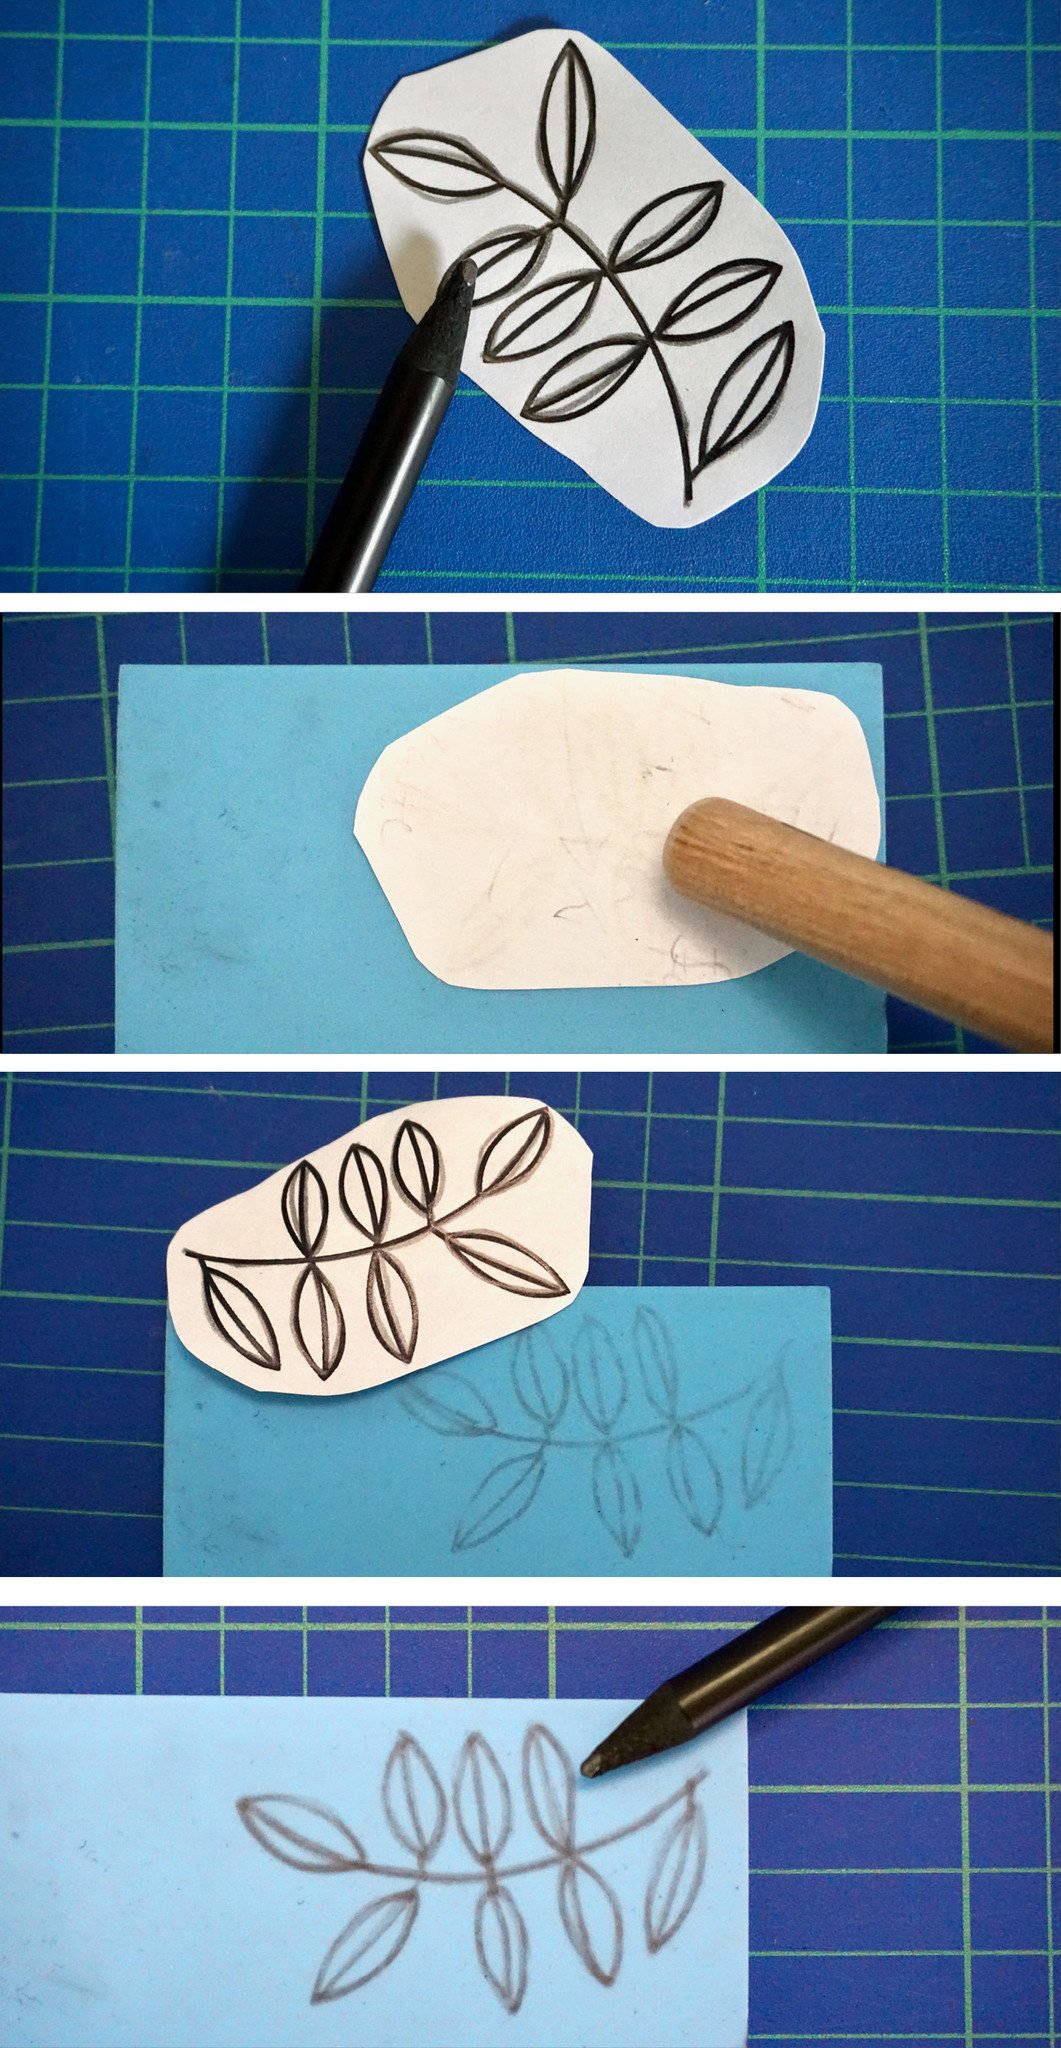
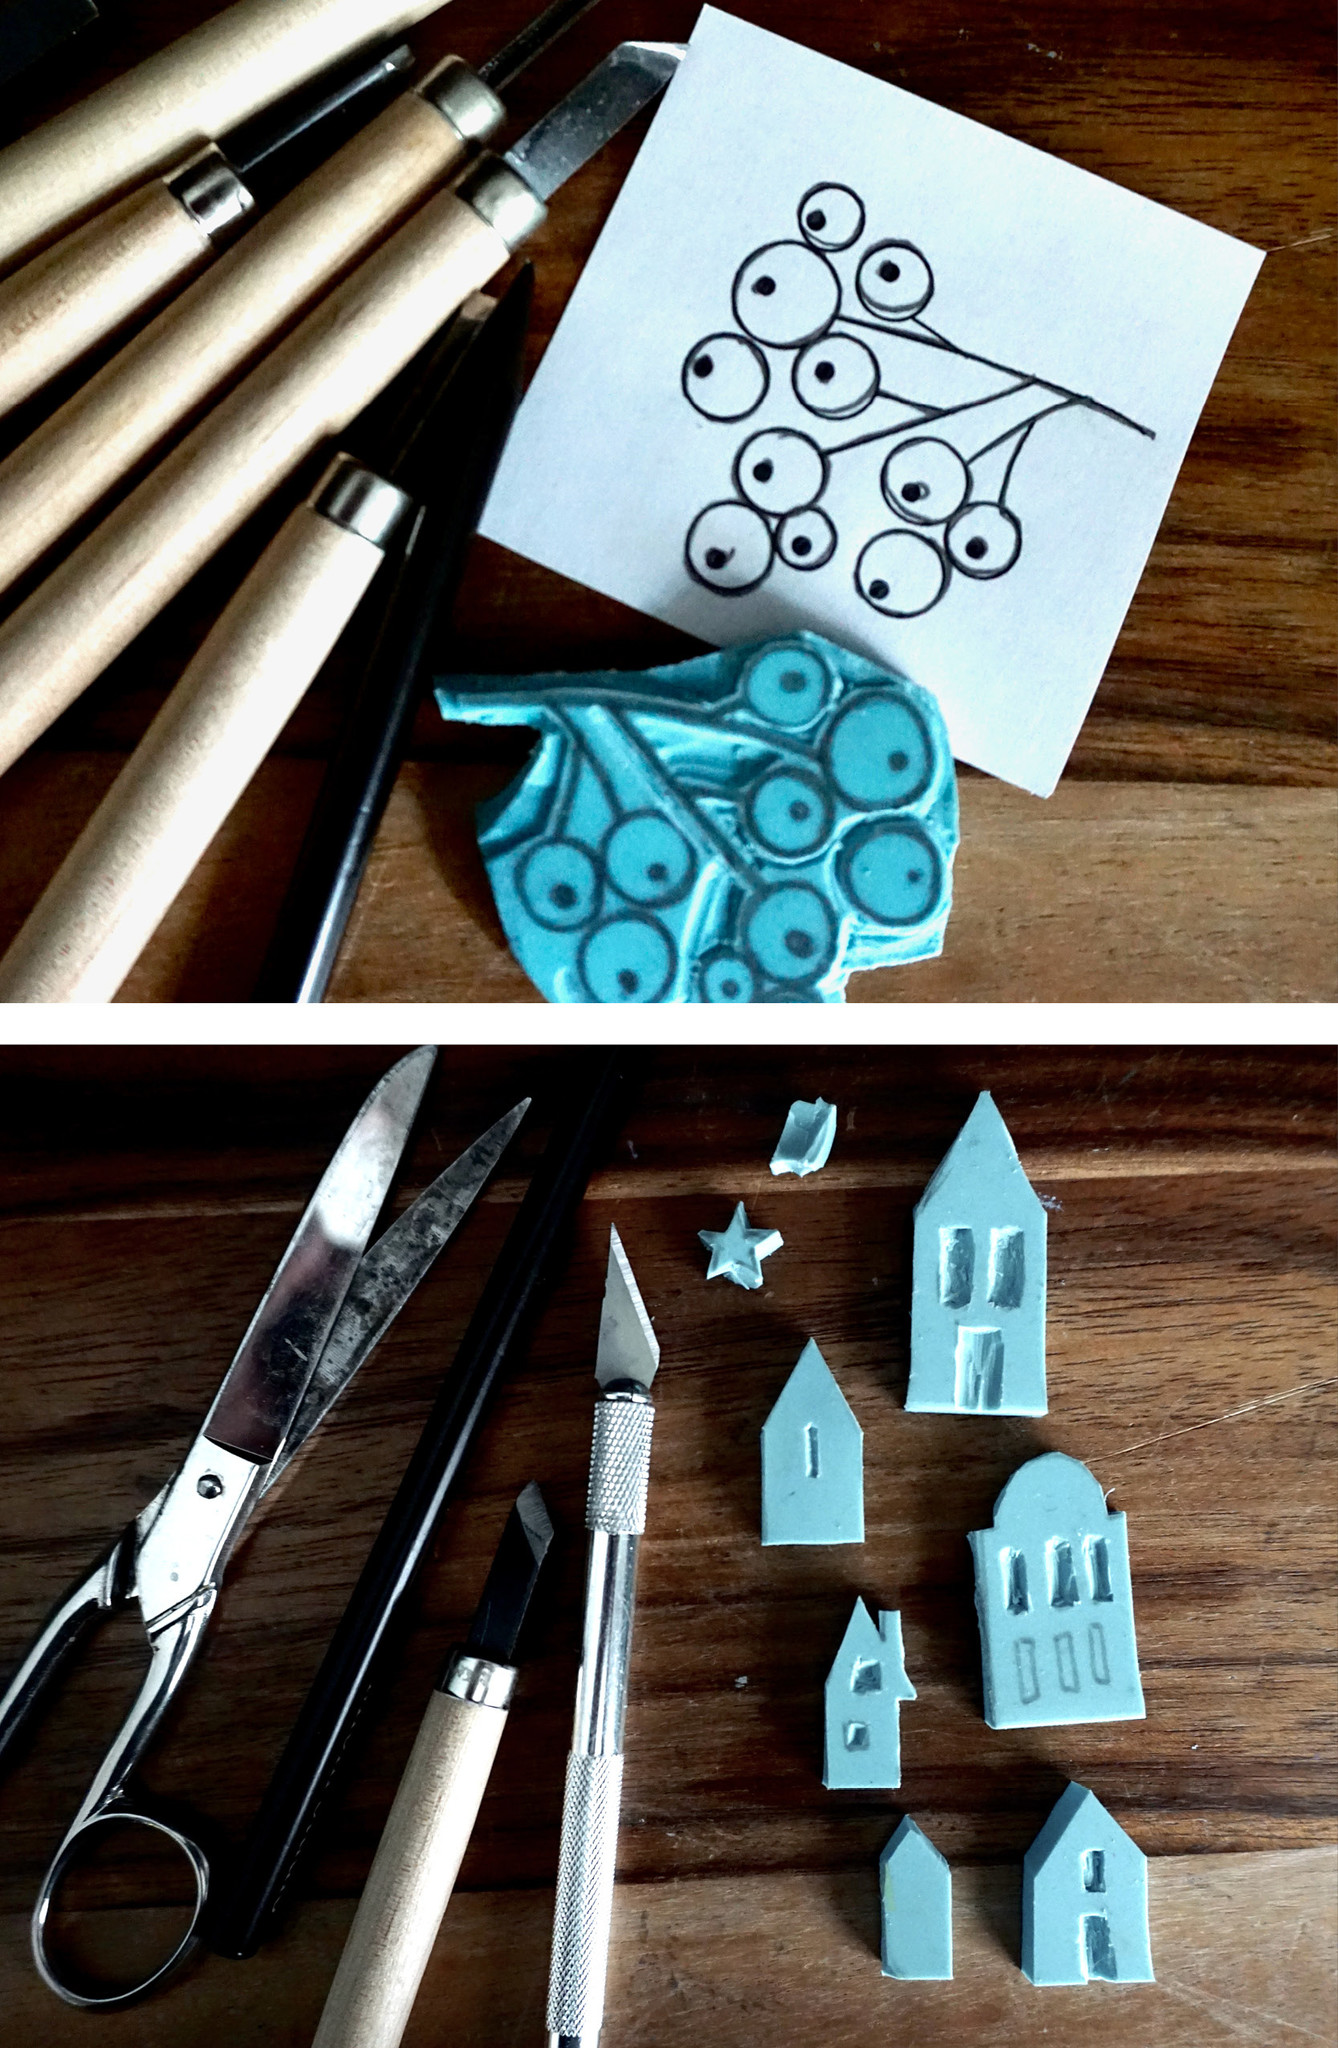
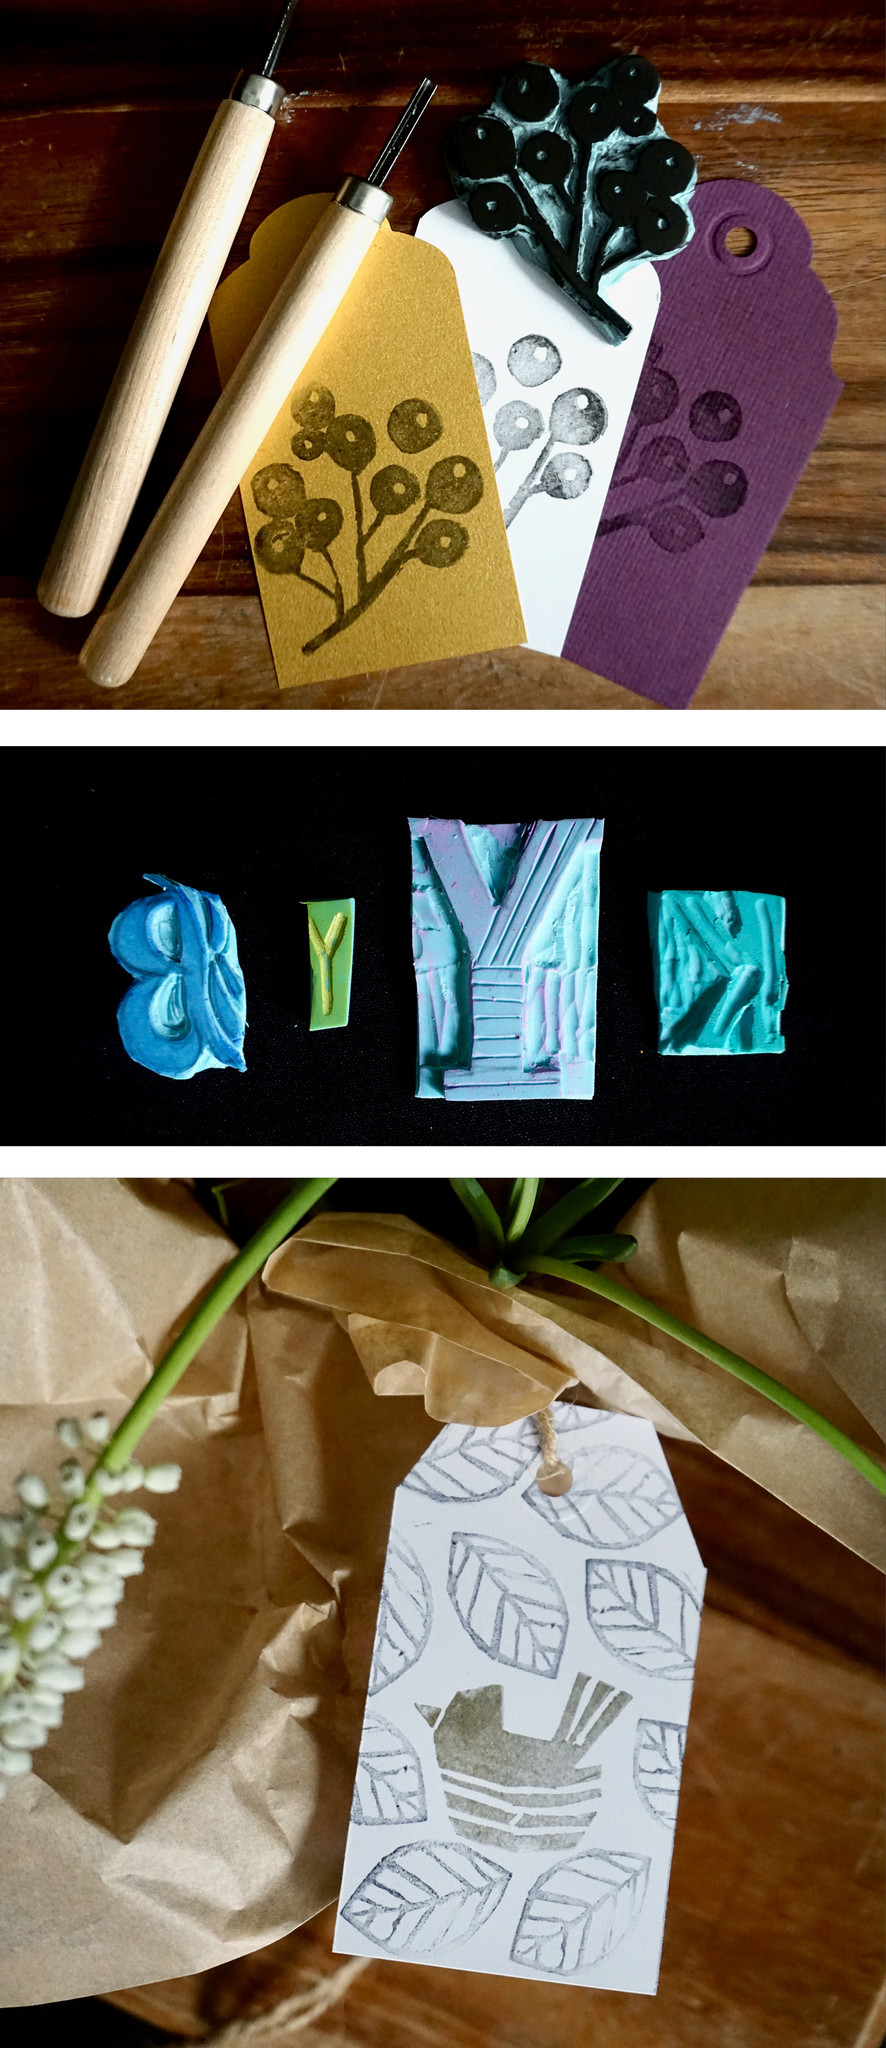
2. Carving the stamp
Cut your basic shape out of the stamp mat. This can be done with scissors, one of the straight carving knives or a scalpel. Make sure that you leave as little or no border as possible because this can leave undesirable marks when printing.
Use the knives with a V-edge to leave lines in the stamp mat. They are suitable for negative cuts. The U-shaped knives are suitable for cutting away wide lines or areas. The straight knives are useful for cutting positive shapes (see below). To do this, cut straight along the outer edge of the shape to be carved out. Then cut parallel to it at an angle into the rubber mat to create a depression around the shape.
Use the V and U carving knives to cut away from you as much as possible. For curves, try rotating the stamp mat accordingly instead of cutting in different directions with the knife.
I prefer cutting and carving on a cutting mat.
Cut lines and areas into the rubber as desired. There is no stamping ink where you cut something out and therefore there is no imprint in these places. You can sweep fine rubber residue from the stamp mat with a toothbrush.
With these stamps you print using the letterpress process. This means that all high areas are covered with stamp ink and thus create impressions. Deep areas do not receive any color and therefore do not create any impression.
3. Stamping
When you are happy with your stamp, you either press it onto an ink pad - as you would do with stamps - or you place it with the motif facing up and dab paint onto the stamp with the ink pad. The latter is recommended if the stamp is larger than the ink pad.
4. Corrections
If you still want to make corrections, you can rework the stamp until you are completely satisfied with your impressions.
5. Further processing
If you want, you can stick the carved stamp mat onto a wooden base - there are special blank blocks available or you can use a simple wooden disc. However, this step is not necessary. I always use my DIY stamps without a carrier.
Positive / negative
You can cut and print motifs positively or negatively. This means that you can either cut away everything around the lines and areas to be printed, so that only the lines and areas that you have not carved out are printed.
Or you can do it the other way around: cut away the lines and surfaces that make up your motif. Anything you cut away will not be printed and will result in your image.
I recommend that beginners start with negative cuts, i.e. first carve lines into a surface.
In these two hearts the difference between positive and negative prints becomes clear (positive on the left, negative on the right):
DIY stamps with kids
Children enjoy making stamps, too! Older children will cut their own stamps. Young children can draw something with a pencil on a stamp mat that has been cut to size and you can then cut it out for them.
Because stamped cards are easy to reproduce, this is a great idea for Christmas cards and birthday invitations.

Inspiration for motifs
Tips for getting started: Large motifs are easier than small ones. Coarse motifs are easier than delicate ones. Abstract motifs easier than concrete representations.
Try: abstract patterns, houses, flowers, leaves, letters (attentio, remember to mirror them!), hearts, stars, sun and moon.
A simple and effective idea to start with is to cut out several squares of the same size from the stamp mat and carve simple patterns into them. Print many prints next to each other and you get a beautiful pattern.

Dia de los muertos oder für Halloween: Hier kannst du eine Vorlage für den Totenkopf-Stempel kostenlos herunterladen. Wie du sie auf die Stempelmatte überträgst, kannst du weiter oben lesen.
♥ Have you carved your own stamp? Feel free to share pictures of it on Instagram and mention @miom_studio so I can see it and share your post! ♥
Follow me for more craft ideas:
Instagram Facebook Pinterest Youtube
Comments
Be the first to comment...